Introduction to the Best Fixed Frame Projector Screen
If you’re looking to elevate your home or office viewing experience, investing in the Best Fixed Frame Projector Screen can make a significant difference. Unlike traditional pull-down screens or portable options, fixed frame projector screens offer a permanent solution that enhances image quality and viewing pleasure. In this article, we will dive deep into what makes these screens a premier choice for both casual users and professional environments.
What Defines a Fixed Frame Projector Screen?
A fixed frame projector screen is a stationary projection surface that is mounted on a wall or an existing structure. It typically consists of a sturdy frame, which is covered with specially designed screen material to provide optimal clarity and color accuracy. Unlike retractable screens, the fixed design allows for consistent tension across the surface, significantly minimizing wrinkles and distortions that can affect image quality during projection.
Why Choose a Fixed Frame Over Other Types?
Choosing a fixed frame projector screen comes with several advantages. Firstly, they offer a sleek and professional appearance that blends seamlessly into a room’s decor. They are ideal for dedicated home theaters or professional environments where aesthetics matter. Secondly, they generally provide superior image quality over pull-down screens, as the tensioned surface minimizes surface imperfections. This makes them an excellent choice for high-definition and ultra-high-definition content.
Key Benefits of Using the Best Fixed Frame Projector Screen
1. Superior Image Quality: Fixed frame screens provide a flat, taut surface that enhances projection clarity, reducing artifacts and providing true-to-life colors.
2. Durability: Constructed from robust materials, these screens are built to last, ensuring your investment pays off for years to come.
3. Wide Viewing Angles: With a fixed frame, you can enjoy the same high-quality image from varying angles within the room.
4. Increased Brightness: Many fixed frame screens feature specialized coatings that enhance brightness and contrast, making them suitable for various lighting conditions.
Understanding Screen Materials and Their Impact
The choice of screen material is critical in determining how effectively it can perform. Here, we’ll examine the common materials used in fixed frame projector screens and their implications for viewing quality.
Common Materials Used for Fixed Frame Screens
The most commonly used materials for fixed frame screens include:
- Matte White: Ideal for most environments, this material offers a balanced light diffusion, ensuring colors appear natural without significant hotspotting.
- Gray (High Contrast): This material works well in rooms with some ambient light, enhancing contrast ratios by absorbing excess light.
- Ambient Light Rejecting (ALR): Designed for environments with significant light interference, ALR materials direct light from projectors while rejecting ambient light to enhance visibility.
How Material Choice Affects Picture Quality
The screen material directly affects how colors are reproduced and how sharp the image appears. For instance, matte white screens are the standard choice, offering good performance in controlled lighting environments. However, in rooms that cannot be completely darkened, gray or ALR screens would be better suited as they provide enhanced contrast and better depth perception. Understanding your environment will guide you to select the most suitable material.
Best Screen Material for Different Viewing Environments
1. Home Theaters: Matte white is typically the most popular choice for dedicated home theaters, especially with projectors that have high lumens.
2. Living Rooms or Multi-Purpose Spaces: Gray screens or ALR materials can provide picture clarity even with everyday lighting situations.
3. Commercial Settings: Depending on the intended use, ALR screens are often ideal to attract audiences by ensuring the best display even in well-lit conference rooms.
Installation and Maintenance Tips for Your Screen
Proper installation and maintenance of your fixed-frame screen significantly affect its performance and longevity. Below are essential guidelines to help you maximize your projector screen experience.
Essential Tools Needed for Setup
Before you begin your installation, gather the following tools:
- Level
- Stud finder
- Drill with appropriate drill bits
- Measuring tape
- Safety goggles
Step-by-Step Installation Guide
Installing a fixed frame screen can be straightforward, assuming you follow these steps:
- Locate Your Ideal Surface: Identify where you want to mount your screen. It should be free of obstructions, including windows or furniture that could block the view.
- Measure Height and Width: Utilize measurements to determine the right placement for your screen, accounting for the viewer’s line of sight.
- Mark Positions: Use the stud finder to locate wall studs for secure mounting. Mark the screen’s corners, ensuring it remains perfectly horizontal.
- Drill Holes: Carefully drill holes where you marked. Please use wall anchors if not drilling into studs.
- Attach the Frame: Secure the screen to the mounted brackets, ensuring it’s taut and flat.
- Test Projection: Before finalizing your installation, test the projection, adjusting as necessary.
Maintenance Tips for Longevity of the Best Fixed Frame Projector Screen
To ensure your fixed frame projector screen lasts, consider the following maintenance tips:
- Regularly clean the screen with a microfiber cloth to remove dust or smudges. Avoid using chemical cleaners, as they may damage the screen material.
- Avoid exposing the screen to direct sunlight when not in use to prevent color fading and material degradation.
- Periodically check the mounting hardware to ensure stability and safety.
Factors to Consider When Buying the Best Fixed Frame Projector Screen
When shopping for your fixed frame projector screen, various factors will influence your purchasing decision. Here are key considerations to keep in mind:
Screen Size and Aspect Ratio Selection
The size of the screen should match both your space and your projector’s native resolution. A common recommendation is to sit at a distance of 1.5 to 2.5 times the width of the screen for optimal viewing. Additionally, aspect ratios come into play; the most common are 16:9 (widescreen) for movies and 4:3 (traditional) for presentations. Select the ratio that aligns with your content viewing habits.
Evaluating Frame Designs and Aesthetic Choices
The frame’s design can affect the overall look of your space. Opinions on thickness and color vary based on personal preference, but a thin frame can provide a sleek, modern aesthetic, while a wider, more embellished frame can give a classic cinema feel. Evaluate what aligns with your existing decor and personal taste.
Understanding Screen Gain and Its Importance
Screen gain refers to how much light the screen reflects, and it plays a vital role in determining how bright your image will be. A gain of 1.0 is considered neutral, while lower gains are softer and better suited for darker environments. Conversely, higher gain screens can be advantageous in brighter settings but might affect the viewing angles. Understanding your environment will help you choose the right gain for your needs.
Enhancing Viewing Experience with the Best Fixed Frame Projector Screen
To truly maximize your viewing experience, consider various additional aspects:
Optimal Viewing Distance: Finding the Right Balance
The distance you sit from the screen can significantly impact comfort and image clarity. For a 120 inch screen, a distance of about 10 feet is generally recommended. Experiment with different positions to find the perfect balance for your space, ensuring everyone in the room has a clear view without straining their eyes.
Complementing Your Screen with Proper Projector Setup
Your projector must also work well with your fixed frame screen. Ensure that your projector’s resolution matches or exceeds your screen’s capabilities to avoid a pixelated image. Additionally, consider the brightness (measured in lumens) based on your typical viewing environment—brighter projectors are necessary for lighter rooms, whereas darker spaces can utilize less powerful ones.
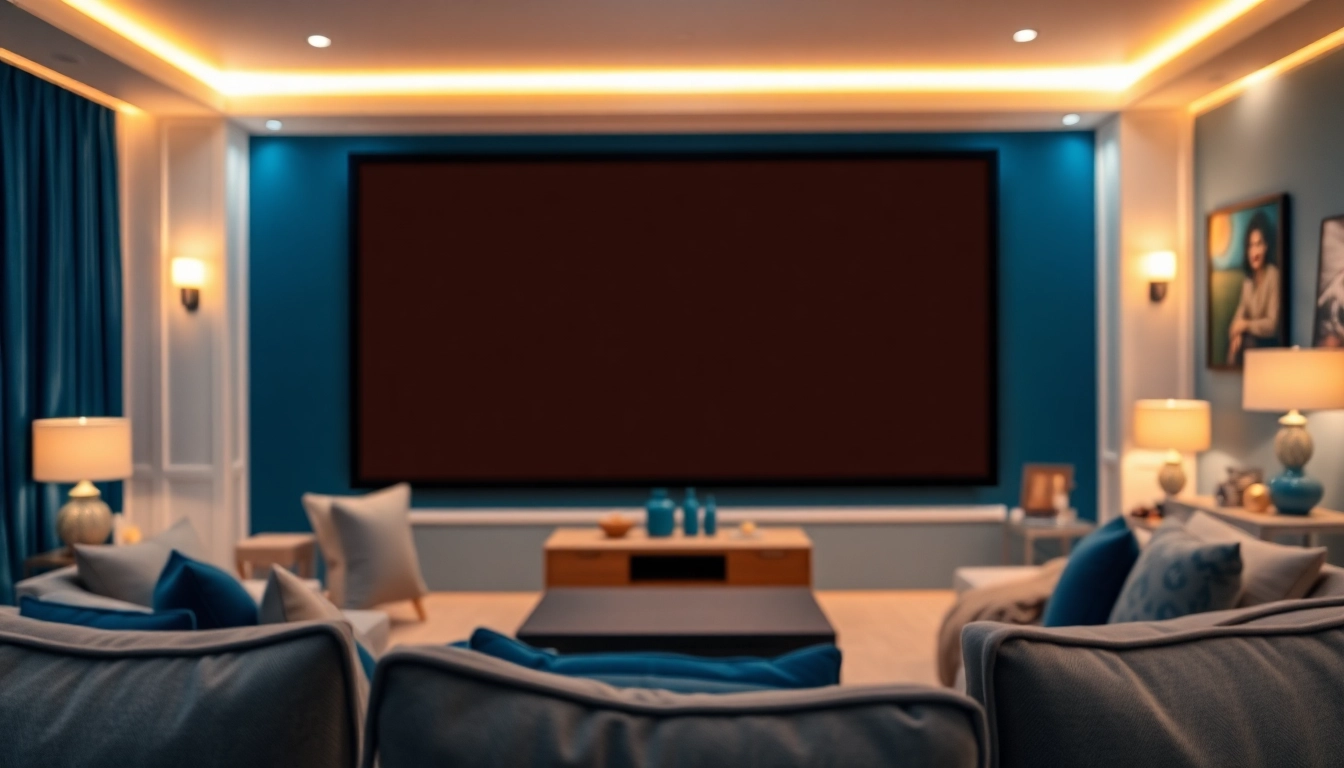
Creating an Atmosphere: Lighting and Sound Considerations
The right lighting and sound setup can further enhance your viewing experience. Opt for dimmable lighting or blackout curtains to control ambient light. For sound, consider integrating a sound bar or home theater system that complements the visual experience with crisp, clear audio. Effective lighting and sound will fully envelop you in the cinematic experience.